
The checkerboard background, also known as the transparency grid, is a default feature in Adobe Photoshop that represents areas with transparency in your images. While helpful for visualizing transparent regions, it can be distracting and confusing when working on projects that require a solid or custom background. In this comprehensive step-by-step guide, we will walk you through various methods to remove the background in Photoshop. Whether you’re a graphic designer, photographer, or digital artist, mastering this technique will ensure your final compositions are clean and professional. Let’s dive in and make your images stand out without the distraction of the checkerboard background!
Bonus tool: Icons8 Background Remover

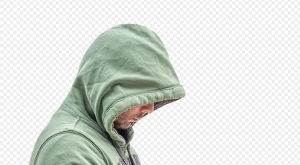
Understanding the Checkerboard Background
Before we dive into the removal process, let’s briefly understand the purpose of the checkerboard background. In Photoshop, areas that are transparent or have no pixels will display the checkerboard pattern. This helps you visualize which parts of your image will be see-through or transparent when saved in a format that supports transparency, such as PNG.
Method 1: Hiding the Checkerboard Background
- Accessing the Background Options: To remove the background, go to the “View” menu at the top of the Photoshop window. From the drop-down menu, click on “Show” and then uncheck the “Transparency Grid” option. This will instantly hide the checkerboard background, making it easier to focus on your image.
- Using Keyboard Shortcut: A quicker way to toggle the transparency grid is by using the keyboard shortcut “Ctrl + H” (Windows) or “Cmd + H” (Mac). Pressing this combination will remove the backgrounds depending on its current state.
Method 2: Filling the Transparent Background
- Creating a New Layer: If you want to fill the transparent background with a solid color or a custom pattern, start by creating a new layer. Go to the Layers panel, click on the “Create a New Layer” button, and place it below your image layer.
- Filling the Background: With the new layer selected, use the Background Eraser Tool (G) to fill the layer with your desired color. Alternatively, you can use the Gradient Tool (G) to apply a gradient or the Pattern Stamp Tool (S) to fill it with a custom pattern.
- Adjusting Opacity: To control the intensity of the background color, adjust the opacity of the new layer. Lower the opacity for a semi-transparent effect or keep it at 100% for a solid background.
Method 3: Merging the Layers
- Making the Background Layer: If you prefer merging your image and background layers, start by creating a new layer below your image layer, just like in Method 2.
- Filling and Merging Layers: Use the Paint Bucket Tool to fill the new layer with your desired background color. Next, merge the image layer and the new background layer by selecting both layers and clicking “Ctrl + E” (Windows) or “Cmd + E” (Mac).
Method 4: Saving with a Solid Background
- Preparing Your Image: Before saving your image with a solid background, ensure that you have already removed the transparency and replaced it with your preferred background color or pattern.
- Save As PNG or JPEG: To preserve the background, save your image in a format that doesn’t support transparency, such as JPEG or PNG. Go to “File” > “Save As,” choose your desired format, and click “Save.”
Bonus Tips for Seamless Background Removal
- Always save a backup of your original image before making any changes.
- If you need to retain transparency for other purposes, save a copy of the image in a format that supports transparency, like PNG.
- Experiment with different background colors or patterns to find the one that complements your image the best.
- Use Layer Styles to add special effects to your background layer, such as shadows or gradients, to enhance your composition further.
Conclusion
By following this step-by-step guide, you now possess the knowledge and techniques to remove background in Photoshop. Whether you choose to hide the transparency grid or add a custom background, these methods will help you create clean and visually appealing images for your graphic design, photography, and digital art projects. Embrace the newfound power to showcase your creativity without any distractions, and take your visual creations to the next level!